Tag Archives: bloggers 50+

For the Love of Carbs #3

Last week we experimented with bread porn.  This week, class entered horror movie territory as we were introduced to… The Slasher!!

The slasher, otherwise known as a bread lame (“lahm”, “lahm-uh”, or as our instructor endearingly pronounced it, “lamb-y”), is a tool used to score dough so that it can expand during baking.  For this session, we improvised with a razor on a stick, which worked pretty well.

unnamed-1

Our final class was perhaps overly ambitious.  We made baguettes, another sourdough, pumpernickel (which we baked at home) and pizza (which we ate during our break).

Baguettes are nearly impossible to bake properly at home since it’s difficult to generate enough steam but we all wanted to try. Abby had made the dough in advance, which looked like Jabba the Hutt as it shimmied its way from its giant pan to the workspace.

IMG-0091

Our baguettes ended up a bit under-baked due to time constraints, and mine got squashed on the ride home. They were tasty, though, and worth another try in the future.

The pizza was fun to make and we’d all worked up an appetite, but I’ll probably stick with Bobby Flay’s recipe. 

Pumpernickel was the most successful, perhaps because it wasn’t rushed.

IMG-0114

The sourdough was good, too.

IMG-0112

Someone asked Abby why she decided to make baking her career, not just a hobby. Her advice: If you lose track of time while you’re doing something, it means you really love it.

We certainly did!

bread class workshop pic (2) (1)

(Abby’s the tall one in the middle, back row. Yours truly is front row left in a scarf.)


For the Love of Carbs #2

Bread class continued with good spirits and much laughter, as we embarked on focaccia, ciabatta and a new method of making sourdough.

IMG-0070

Is that apprehension I’m sensing?

First up, some brave souls brought in their starters for Abby to evaluate. We learned that a starter is ready to use if a small bit floats when immersed in water. Sadly, most of our efforts sank like a stone. (Cue “My heart will go on”.)

To make both focaccia and ciabatta, you begin with a “poolish”, which is pronounced poo-leash rather than rhyming with “foolish” which is how we felt about our sinking non-starters. This is essentially another type of starter that is ready much faster and keeps the dough nice and airy.

Abby kept us on a strict schedule so we could bake these during class. Unfortunately, my benchmate and I made the crucial mistake of flouring the tops of our ciabattas, not realizing they’d be flipped over. (Or possibly not paying attention?) And I opted not to cut the dough into rolls, ending up with a pale loaf bearing more than a passing resemblance to a manatee.

IMG-0074.JPG

Ciabatta in the oven

IMG-0072.jpg

Abby suspects they’re not quite ready.

Our focaccias weren’t much prettier, being pancake-flat. But despite their wonky appearance, both breads were pretty tasty.

IMG-0073

Focaccia resembling paddleboards

The big excitement of the evening came when we learned a new technique that brought out our inner dominatrix. Abby had e-mailed us a video to get us “in the mood”. It’s called the slap and fold method, or, as my friend S dubbed it, Food Porn: You slap your dough on the counter, stretch it up and slap it down again. After about 5 minutes the dough is ready to rest, and so are you.

Who knew that bread making had a racy side? Or that my wardrobe needs a black leather apron?!

                                  (Above, clockwise: focaccia at home – I added rosemary -, ciabatta, sourdough.)

I can only imagine what’s in store for us this week. Stay tuned, dear friends.

For the Love of Carbs

Whoever said, “Man cannot live by bread alone” clearly didn’t live in my house. To that end, I’ve embarked on a series of 3 consecutive weekly classes in bread making, hoping to hone my skills or at the very least make and eat lots of yummy things.

Our first class was Tuesday night. Ten strangers introduced ourselves, commenting on each other’s aprons (the best one: printed with unpronounceable Scottish phrases) and gleaning levels of expertise. We ran the gamut from novice to knowledgeable.

Few things bind people together more than a shared interest; in this case hunger, as the class runs from 6-9 pm and no one had had dinner. As we descended on the snack table – samples of the bread we’d soon be baking – things quickly loosened up.

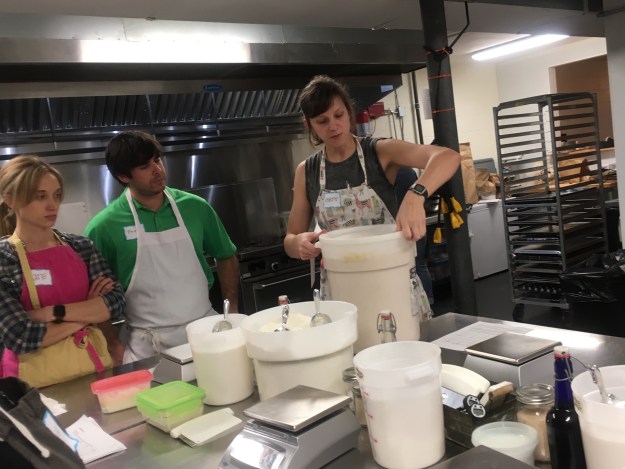
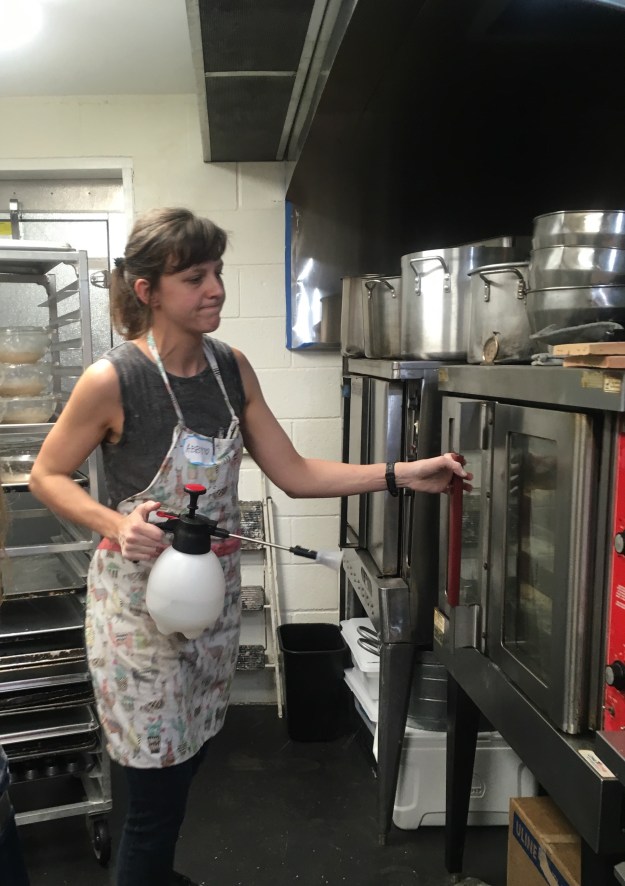
And then the work began. Abby, our intrepid instructor, handed out sheets of recipes (blue emmer sandwich bread, sourdough and challah) and led us back to the industrial kitchen where we started our first loaf.

First lesson: Measure your ingredients by weight, not volume. Turns out, it’s more accurate since flours vary in density, and it’s easier too. You put a bowl on a scale, set it to zero, and reset it to zero after you’ve added each ingredient. To quote the Monkees, now I’m a believer.

The whole group got down and dirty as we over- or under-loaded our bowls, covered ourselves in flour while dumping it out to re-measure, and got sticky bits of dough in our hair and jewelry. (Note to self: don’t wear a watch.) If you’re a clean freak, this “sport” may not be for you. One tip if you don’t want to keep running to the sink: keep a bowl of extra wheat flour available and rub your hands in it to remove most of the dough.

Then we started kneading. Not only is this a great upper-body workout (3 hours of standing and punching dough should cancel out all those calories, right?), it must be one of the earliest forms of therapy. PINCH! That’s for your annoying neighbor. POUND! That’s for your obnoxious boss. FLATTEN! That’s for every bad relationship you’ve ever had.

We also learned a great trick for preserving your starter if you don’t make bread multiple times a week: Roll some of the sticky starter in wheat flour and keep rubbing until it dries out into a crumbly nub. Abby says it will keep for quite awhile in the fridge (will have to ask how long “awhile” is) until you’re ready to reactivate it.

To keep your starter bubbly and active you’ll have to feed it 1-2x a week. (Starter is a fairly demanding pet but at least it won’t pee in the house!)

Keep it loosely covered in the fridge. A day or two before you plan to bake, dump out about 90% (this takes self-discipline as it seems so wasteful), then add back equal parts water and flour (half wheat/half bread flour) – making at least 130g (1 cup for your recipe plus extra to maintain it). Cover loosely and let it sit out on your counter for 8-10 hours. When the starter gets airy and fragrant, repeat the process.

If you don’t plan to bake for a few days, feed your leftover with more flour than water or dry it out as suggested above.

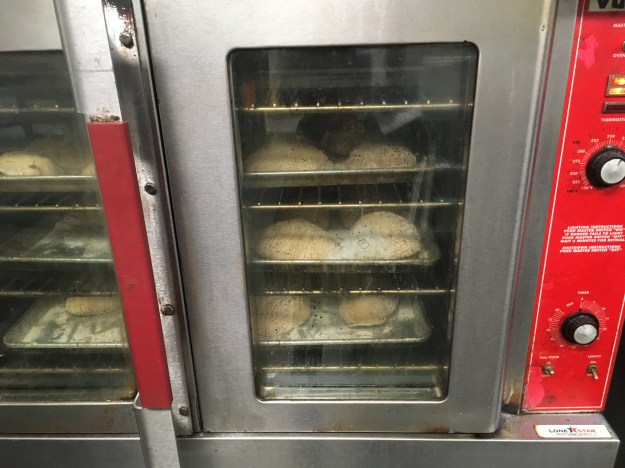
Exhausted but exhilarated, we left with three batches of dough to bake on our own, plus a dried nub of starter to resurrect. Abby encouraged us to name our starters – hers is Shiva. Since I have a tendency to kill mine on a regular basis, I’m naming him Lazarus.

Verdict:

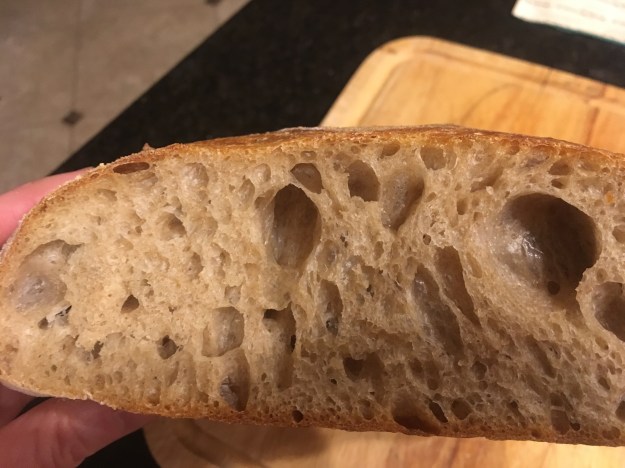
“Meh” on the blue emmer bread. It was kind of flabby and spongy. A little too much like health food and not enough like “indulgence”.

“Yay” on the sourdough method, although the amount of dough we made was a bit small for my cast iron Dutch oven. And my usual method yields a darker, crisper crust.

“Pretty good” for the challah – I prefer the recipe in the Silver Palate Cookbook. DH says this one reminds him more of a brioche.

Looking forward to this week’s class. Especially the snacks.

p.s. Final tip: Don’t add salt with the rest of your ingredients.  Let dough hydrate (aka rest) for an hour and then mix in the salt.  Apparently it interferes with gluten production. Did not know that.

[main photo source: pixabay.com]


The Apocalypse on $10,000 a Day

A couple of nights ago, we watched the 2012 movie Seeking a Friend for the End of the World. The premise: an asteroid is hurtling towards Earth and will wipe out everyone in 3 weeks.

planet-519937_640

What would you do? Here’s my exit strategy.

Liquidate savings, leaving just a little in case the forecast is, you know, wrong.

Fly (first class of course) to a remote tropical island with a 5-star resort. Pack tons of books, many bottles of limited edition Islay whiskey, and sunscreen. (My end-of-life scenario doesn’t include suffering from painful sunburn.)

Check into our suite, having reserved all the rooms on the floor so as not to endure  fighting couples or screaming children.

Every day:

  • Walk on the beach. No sense meeting my Maker with flabby thighs.
  • Have a 3-hour massage, with one hour spent on neck and shoulders.
  • Drink steadily but only to maintain pleasant buzz, not hangover.
  • Have dessert at lunch and dinner. Who’s judging?
  • Have sex. OK, maybe not EVERY day.

Binge-watch all 19 seasons of Midsomer Murders. Mysteries are soothing because  bad guys always get caught. Unlike life.

Be friendly but don’t waste a minute with anyone who is boring or mean.

Consume plenty of fresh papaya, mango and strawberries. End-of-days plan should  not include constipation.

See glorious sunsets.

Gorge on cheese and chocolate. Cholesterol be damned.

Snuggle up with my sweetie every night. Drift off remembering every nice thing that’s ever happened to me.

There are worse ways to go.

Photo source: Pixabay

You Say Biscuit, I Say Cookie, We All Say Yummy

IMG-0028This week, I was inspired to bake up some digestive biscuits – probably because I’d been watching “Victoria” on TV. They turned out beautifully and I became curious about their origins.

The first digestive biscuit (“cookie” in American English) was the McVitie’s Digestive, created in 1892 by Alexander Grant, a young new company employee. The biscuit was given its name because it was thought that its high baking soda content served as an aid to food digestion.

I was skeptical – and wondering how many you’d have to eat to get any benefit – but according to LiveStrong.com, “ Baking soda (sodium bicarbonate*) helps to break down fatty substances and food particles, making them easier to digest and calming the turmoil in your stomach.”

In any case, digestives are a delicious, light cookie made with mostly whole-wheat flour for a nice fiber content. I wouldn’t call them health food but when your sweet tooth is calling they probably stack up pretty well compared with other cookies. (I’m talking to you, chocolate chips!)

It’s easy to make your own, and the butter tastes better than the palm oil in commercial products.

RECIPE (Adapted from King Arthur Flour)

Ingredients Click here for measurement by grams or ounces

  • 1/2 cup unbleached all-purpose flour
  • 1 1/2 cups whole wheat flour
  • 1 teaspoon baking powder
  • (my addition: a pinch of salt)
  • 1/2 cup (8 tablespoons) unsalted butter, at room temperature
  • 3/4 cup confectioners’ sugar
  • 1/4 cup cold milk

Instructions

  1.  Preheat your oven to 350°F. Lightly grease a couple of baking sheets, or line them with parchment paper.
  2. There are two options for blending ingredients: Hand method: Measure the flour and baking powder into a mixing bowl. Using a pastry blender, two knives, or your fingertips, rub the butter into the flour mixture. Add the sugar, (salt) and enough milk to make a stiff dough. Gently and briefly knead this mixture on a floured surface until smooth. Food Processor: Pulse the flour, (salt,) sugar, butter and baking powder in a food processor just long enough to create pea-sized bits of butter. Add milk and pulse briefly, just until mixture comes together. Be careful not to over blend.
  3. Roll out the dough to approximately 1/8″ thick, and cut into circles. Traditionally, the biscuits are about 2 1/2″ in diameter (a slightly smaller cookie cutter is the perfect size since they will not spread out much).
  4. Place the cutout cookies on the prepared baking sheets. Prick them all over with a fork, and bake until pale gold, about 15 minutes.
  5. Remove the cookies from the oven, and cool right in the pan. Store airtight at room temperature for up to a week or refrigerate if you like them extra crispy; freeze for longer storage.

YIELD: about 3 dozen cookies. Particularly delicious with a pot of freshly-brewed tea.

*In case you’re wondering: Baking soda has only one ingredient, sodium bicarbonate. Sodium bicarbonate is a base that reacts when it comes into contact with acids, like buttermilk, yogurt or vinegar. Baking powder also contains two acids.

Worst Vacation Ever?

promotion in today’s e-mail made me ponder what qualifies as my worst travel experience. Usually, these fall in the Relatively Minor Irritations category: delayed luggage, missed connections, bad food, and so on. I don’t think any of the Merely Annoying will win this contest.

Then I remembered the Wish-I-Could Forget trip to the Caribbean with my then-husband (my ultimate “wish I could forget” experience, but that’s another story). Along with our 2 year old son, we  traveled to Nassau in the Bahamas for what should have been a restful week.

A couple of nights in, we decided to have dinner at the resort and accepted their recommendation for a babysitter. After a pleasant meal, we returned to our room, paid the sitter, and checked on the baby.

He was fine, but something just felt “off”.

Turned out, the sitter had slashed through our luggage and stolen everything that looked valuable including clothing and shoes as well as cameras, extra cash etc. The hotel manager was faux-apologetic, the woman “couldn’t” be located, and any thought of a relaxing vacation was hopeless.

I’d enter the contest and provide more lurid details, but what if they offered to send me BACK to Nassau for my do-over?? No, thank you!!

However, YOU should click this link. Good luck and let me know if you win!

 o_vdo_35_600x600_v2_enternow.jpg


“Anti”-Aging

Allure magazine has recently reported that they’ll no longer use the term “anti-aging”. It’s about time.

Since we’ve only got two options — getting older or checking out — there’s not much point in fighting the inevitable. Instead, let’s embrace some of the positives and enjoy being our best selves.

IMG-0025 (1)

Antiques are so much more interesting than newbies!

The List

1. YOUR DOUBLE CHIN DISAPPEARS. With the passing years, fat pads under our chins usually get smaller as our faces become less round. (Bonus: more visible cheekbones!) So if you’re considering a fat removal procedure in your 20’s or 30’s, you should probably wait.

2. YOU’RE HAPPIER. According to a study in the Journal of Clinical Psychology, happiness steadily increases from your 20’s to your 90’s as anxiety, depression and stress levels tend to go down.

3. YOU CAN WAVE GOODBYE TO THE BAGS UNDER YOUR EYES. When we’re younger, these are often fatty deposits. In older women, they’re more likely caused by fluid retention, which decreases as we go about our day.

4. SEX IMPROVES. Caveat: The study they cite in the magazine contrasts higher levels of satisfaction for women in their 40’s and 50’s vs. women in their early 20’s. Older women know their bodies better, are more likely to ask for what they want, and may be more spontaneous. (Note: no mention of post-menopausal issues, though.)

5. YOUR SKIN IS GLOWIER. Again, they’re talking 30’s-50’s, when moisture levels are highest and problems such as acne tend to resolve themselves. Moisture levels drop as hormones and hydration decrease, so 60+ skin often needs extra help.

6. YOU’LL SAVE ON WAXING. As testosterone dips in your 40’s, body hair starts to be lighter and thinner. Post-menopause, skin becomes thinner and waxing may be more irritating than a gentler process such as sugaring. Or, fuhgeddaboudit.

7. YOU’RE MORE OPEN-MINDED. A University of Michigan study found that women in their 50’s were more empathetic than those who were younger. Mature people may have strong opinions but we’re also more likely to understand other points of view.

For more thoughts on aging, plus a delicious cocktail recipe, click here.


Random Household Hacks

A New Year’s Resolution: I will search for answers to life’s pesky little problems and share my finds with all of you.

#1:  How to open a stubborn jar lid

Let’s assume that brute strength has not done the trick.  Here are some options:

1) Improve your grip

  • Put plastic wrap over the lid and twist.
  • Place a rubber band around the lid and twist.
  • Put on a rubber glove and twist.  (Anyone else reminded of Chubby Checker??)

2) Tap around the edge of the cap with a wooden spoon.  This should release the air pockets of the vacuum seal. It’s also less likely to shatter the jar than banging it on your countertop.

3) Still stuck?  Turn your jar upside down and place in a bowl filled with hot water. After about 30 seconds, the lid should loosen.

4) For sticky stuff (honey, molasses, etc.), plan ahead. Cover the jar opening with plastic wrap before you put the lid back on. (This also helps with paint cans.)

#2 How to quickly chill wine or beer 

Uh oh — unexpected, thirsty guests have arrived! Wrap a damp paper towel around the bottle or cans and place them in the freezer.  They will chill much faster than without the towel. Do not forget they are in the freezer! (Yes, I have done this and then had to clean up the resulting mess.)

chill-706209_640


Lipstick On Your Collar?

Calling all ladies, drag queens, and overly-enthusiastic lovers: If you’ve ever gotten lipstick on your clothes (e.g., on the collar as you pulled a blouse or sweater over your head, or on your sleeve as you brushed your hair) you’ll appreciate the following advice I found online.

After you stop swearing, act quickly and there’s a good chance you can salvage the situation and avoid a permanent stain on your shirt or reputation.

(Adapted from WhoWhatWear)

  1. Remove excess lipstick. Using the smooth edge of a butter knife or credit card, gently scrape off any pieces you can without rubbing more into the fabric. This keeps the stain from spreading.
  2. Blot with alcohol. Dampen a clean cloth or cotton square with isopropyl (“rubbing”) alcohol. Dab gently (don’t rub!); then, rinse the fabric thoroughly with cold water. For delicate or vividly-dyed fabrics, test an inconspicuous area first to make sure the color won’t run.
  3. Apply stain remover if the stain persists. Although eco-friendly stain removers tend to be gentler on fabric, stubborn stains may require a chemical-based product. Either way, check the care label before using a stain remover.
  4. Wash with liquid detergent. Submerge the stained area in warm water and rub gently, using a small amount of liquid detergent. (Note: very hot water can cause the stain to “bleed”.) Once the stain is hard to see, machine washing should be safe.
  5. Another option: hairspray. Spray hairspray directly onto the stain and let it sit for 10 to 15 minutes. Dip a clean cloth in warm water and gently blot the stain. This should remove both the hairspray and the lipstick.

If all else fails, visit your dry cleaner.

A quick Google search reveals that the first use of “dry” cleaning (which is, in fact, a wet process using solvents instead of water) was to get stains out of togas. You’ll be happy to know that modern methods no longer use ammonia derived from urine, which was the ancient Roman method. Ewww.

Today, clothes are loaded into a machine that looks similar to a regular washing machine, and dry-cleaning chemicals are added. One of the most common solvents is tetrachloroethylene, aka perchlorethylene (“perc”), which has fallen out of favor due to health and environmental concerns. As a result, there’s been more widespread demand for biodegradable alternatives such as siloxane.

Finally, here’s a totally random hack I love: To shorten sleeves on a blazer or coat without tailoring, gather the inside sleeve fabric at the elbow and secure with a safety pin. Genius!

lips-2024681_640


Hair Today, and Other Resolutions

My new hair stylist says:

“As we get older, our hair should get softer and our clothes more structured.”

Words to live by! Layers of flow-y fabrics can make us look shapeless, while sharply angled, severe or stiff hair styles can be a harsh contrast to a softening jawline.

January brings with it not only the predictable resolutions (eat less, floss more) but also the sobering bills resulting from December splurges on gifts and entertaining.

If you love fashion, January can be a minefield of temptation. Below are 10 ways to trim your fashion budget this (or any) month, no matter your age:

  1. Break the browsing habit. Whether you’re scrolling or strolling, something’s sure to catch your eye. Unless you need a specific item to fill a gap in your wardrobe or replace an old/worn-out/ill-fitting favorite, resist!
  2. Likewise, note inspirational looks on Pinterest, Instagram or in magazines; then bookmark and set aside to see if you’re still obsessed next month.
  3. Don’t buy multiples or duplicates of stuff you already have. Chances are, one of your many black blazers is still your go-to.
  4. Save on tailoring. Yes, it makes everything look better but try to limit yourself to clothes that fit you right now.
  5. Skip the sales. You’ve undoubtedly heard the advice, “If you wouldn’t buy it at full price don’t buy it on sale.” You’ll avoid temptation and shopping regrets.
  6. Put your monthly fashion fix subscription box on hold. If it doesn’t arrive on your doorstep, you won’t crave that new belt, scarf, blouse etc.
  7. Avoid dry-clean-only purchases. They add significantly to the price of an item.
  8. Be careful when ordering from overseas e-tailers. Shipping costs can be significant, especially if you need to return your purchase.
  9. Similarly, don’t order from places without generous return policies and free shipping. That Chanel jacket on RealReal may seem like a bargain, but if it doesn’t fit you’ve just blown real money sending it back.
  10. Space out your beauty appointments. Extending the time between haircuts by 2 weeks (say, every 10 weeks instead of every 8) can save you the cost of two appointments per year.

Happy New Year, dear readers and fellow bloggers! And here’s hoping that 2018 is better than 2017 – a pretty sucky year worldwide.

Cheers, Alisa